I had no idea the refit bridge was so...big.
-
Welcome! The TrekBBS is the number one place to chat about Star Trek with like-minded fans.
If you are not already a member then please register an account and join in the discussion!
You are using an out of date browser. It may not display this or other websites correctly.
You should upgrade or use an alternative browser.
You should upgrade or use an alternative browser.
"Building" the Refit 1701 Bridge
- Thread starter Bill Thompson
- Start date
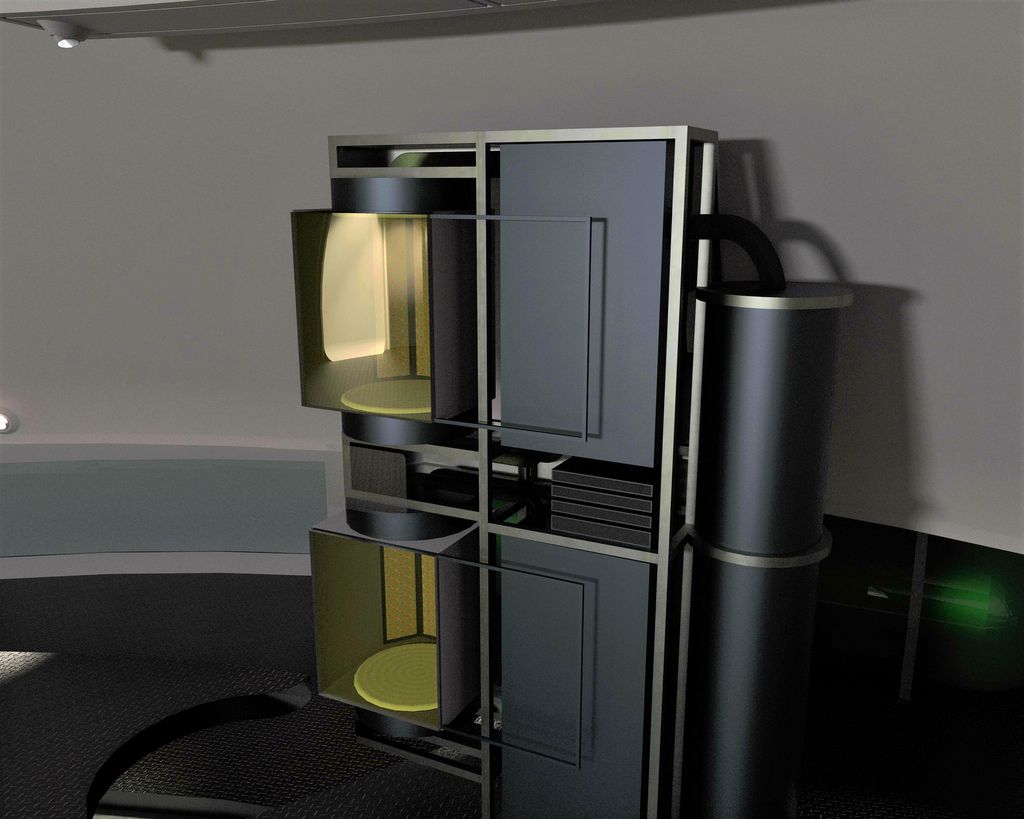
WORK ON THE INTERIOR FACE of the module is now proceeding apace.

The inner shell assembles in much the same way as the outer shell; except that it is split into right/left sections rather than upper/lower ones. Ernie, Bob, and Mike call it a night: there's not much they can do until Eddie and I get the rest of the parts in place. Tomas is setting the light array in place after making the proper connections (it clips in place, no tools required) while Eddie brings a blanking panel, since this module only uses one light array. The cove pieces are universal for each bridge module (there's that modularity of design again!) and can take one, two, or no light arrays, depending on that particular module's design and placement within the bridge.
Notice the shutpanels in the accessway behind the shell. Those are for sealing off the access holes behind the module. Each panel is labelled so a maintenance tech can easily locate any specific component from the accessway.

I've started assembling the control console out on the warehouse floor. The console itself is merely a convenient way to mount related components together in the same physical space. The consoles were supplied in standardized sizes, and the faces were cut to fit the components as needed for each application. This is very much like the old Connie bridge segments, each one of which was identical except for the tactile-prismatic control layouts and data screens. But that's where the similarity ends, and is one of the areas where Starfleet's "Phase II" design philosophy really shines.
The individual components are completely self-contained I/O units that can be daisy-chained together and trunked singularly directly to the computer core. The black anti-smudge polycarbonate faces used capacitive touch switches for most functions, with tactile buttons, knobs and/or sliders for sensitive or data-specific input. I'm holding one of the most iconic components: the Starfleet standard computer input keypad, which revolutionized control input through the era, and its hexagonal key layout is still used today.
Note that even though the panels are smooth and featureless when powered off, none of the components use live display technology: the controls are all discrete under the surface. Simplicity and interchangability was key in the day, and the SCE thinking at the time was that easily-repairable modularity would be less troublesome years into a mission than live-panel displays that were not so easily or quickly repaired in the field. Of course, now we know the opposite is true--live panels are proving more durable in the long term, and there is a built-in redundancy in the capacity to reassign entire displays in emergencies. I can see a future when all Starfleet vessels will have bridge modules that are little more than a wall of smooth polycarbonate--essentially twelve live screens that would combine control input and data output on the same surface!
Eddie's just reminded me that unless we want to be here all night I should have the control panel ready to go by the time he installs the assign panel and holodisplay, so I'd better stop talking and get working.

And here's Eddie steadying the panel in place in the module, while Tomas clamps it tight to the shell and runs the electrics. And suddenly, almost magically, this one little fragment of 1701 in place again, after years of dusty storage, gives this generic, empty bridge dome a palpable sense of history.
Although the module is dark and lifeless now, the bridge when finished will be humming with activity--but it will be an artificial activity. Without a computer core, or in fact a Starship to connect to, the bridge modules would have nothing to do. The museum display, however, will be a moment frozen in time: the modules will be routed to a computer that will feed data to the components that will, in effect, 'fool' the bridge into thinking it is perpetually at a time when normal ship's operations are going on.

With the final quarter-turn of a spanner, the shutpanels are in place and locked down. Before calling it a night, we test the module's operation. Tomas reaches around and under the upper bridge deck, and plugs in the connections to the little computer and EPS feed. From around the front of the module, Eddie playfully calls out in a passable imitation of Colin Clive's iconic line from 1931's Frankenstein: 'It's alive! it's alive! alive!"

A small glimpse of things to come! As the panels spring to life, this one lonely module is absolutely convinced it is in the middle of receiving a transport on Plate 1 from minitransporter pad 11 in Engineering. It thinks its getting power from the warp engines, it even thinks whatever-it-is that it's receiving is nearly molecularly synced with its nonexistent transporter buffers.
Although I know that it's only a collection of components receiving false data, I am surprised at how easily I anthropomorphically assign 'thinking' to the module.
That's enough excitement for one day. Tomas powers down the computer, I hit the EPS feed, and Eddie secures the building. Tomorrow's another day, and now that we've got practice getting one module in, the rest should go quickly--as long as the parts are all here.
The inner shell assembles in much the same way as the outer shell; except that it is split into right/left sections rather than upper/lower ones. Ernie, Bob, and Mike call it a night: there's not much they can do until Eddie and I get the rest of the parts in place. Tomas is setting the light array in place after making the proper connections (it clips in place, no tools required) while Eddie brings a blanking panel, since this module only uses one light array. The cove pieces are universal for each bridge module (there's that modularity of design again!) and can take one, two, or no light arrays, depending on that particular module's design and placement within the bridge.
Notice the shutpanels in the accessway behind the shell. Those are for sealing off the access holes behind the module. Each panel is labelled so a maintenance tech can easily locate any specific component from the accessway.
I've started assembling the control console out on the warehouse floor. The console itself is merely a convenient way to mount related components together in the same physical space. The consoles were supplied in standardized sizes, and the faces were cut to fit the components as needed for each application. This is very much like the old Connie bridge segments, each one of which was identical except for the tactile-prismatic control layouts and data screens. But that's where the similarity ends, and is one of the areas where Starfleet's "Phase II" design philosophy really shines.
The individual components are completely self-contained I/O units that can be daisy-chained together and trunked singularly directly to the computer core. The black anti-smudge polycarbonate faces used capacitive touch switches for most functions, with tactile buttons, knobs and/or sliders for sensitive or data-specific input. I'm holding one of the most iconic components: the Starfleet standard computer input keypad, which revolutionized control input through the era, and its hexagonal key layout is still used today.
Note that even though the panels are smooth and featureless when powered off, none of the components use live display technology: the controls are all discrete under the surface. Simplicity and interchangability was key in the day, and the SCE thinking at the time was that easily-repairable modularity would be less troublesome years into a mission than live-panel displays that were not so easily or quickly repaired in the field. Of course, now we know the opposite is true--live panels are proving more durable in the long term, and there is a built-in redundancy in the capacity to reassign entire displays in emergencies. I can see a future when all Starfleet vessels will have bridge modules that are little more than a wall of smooth polycarbonate--essentially twelve live screens that would combine control input and data output on the same surface!
Eddie's just reminded me that unless we want to be here all night I should have the control panel ready to go by the time he installs the assign panel and holodisplay, so I'd better stop talking and get working.
And here's Eddie steadying the panel in place in the module, while Tomas clamps it tight to the shell and runs the electrics. And suddenly, almost magically, this one little fragment of 1701 in place again, after years of dusty storage, gives this generic, empty bridge dome a palpable sense of history.
Although the module is dark and lifeless now, the bridge when finished will be humming with activity--but it will be an artificial activity. Without a computer core, or in fact a Starship to connect to, the bridge modules would have nothing to do. The museum display, however, will be a moment frozen in time: the modules will be routed to a computer that will feed data to the components that will, in effect, 'fool' the bridge into thinking it is perpetually at a time when normal ship's operations are going on.
With the final quarter-turn of a spanner, the shutpanels are in place and locked down. Before calling it a night, we test the module's operation. Tomas reaches around and under the upper bridge deck, and plugs in the connections to the little computer and EPS feed. From around the front of the module, Eddie playfully calls out in a passable imitation of Colin Clive's iconic line from 1931's Frankenstein: 'It's alive! it's alive! alive!"
A small glimpse of things to come! As the panels spring to life, this one lonely module is absolutely convinced it is in the middle of receiving a transport on Plate 1 from minitransporter pad 11 in Engineering. It thinks its getting power from the warp engines, it even thinks whatever-it-is that it's receiving is nearly molecularly synced with its nonexistent transporter buffers.
Although I know that it's only a collection of components receiving false data, I am surprised at how easily I anthropomorphically assign 'thinking' to the module.
That's enough excitement for one day. Tomas powers down the computer, I hit the EPS feed, and Eddie secures the building. Tomorrow's another day, and now that we've got practice getting one module in, the rest should go quickly--as long as the parts are all here.
Last edited:
I'm really liking this thread keep up the good work
Hopefully it won't get C&D'd like Stage 9 just did. 
Hopefully it won't get C&D'd like Stage 9 just did.
All we're getting are pictures. Nothing downloadable that we ourselves could play with. Maybe later videos, same as with Donny's projects, but for now just pictures.
If CBS starts going after those, we might as well give up on Trek fandom altogether.
All we're getting are pictures. Nothing downloadable that we ourselves could play with. Maybe later videos, same as with Donny's projects, but for now just pictures.
If CBS starts going after those, we might as well give up on Trek fandom altogether.
As difficult as that decision would be for me, I certainly would.
With all the recent bother from CBS, I'm concerned about even having the Sketchup models available online--something I was planning on having freely available. So alas, it's just snapshots for now. And what's evolving into an increasingly engaging story, of course, as the characters of Bob, Mike, and the gang get fleshed out. (And yes, I'm gonna introduce a female engineer too!) I actually feel kinda bad about Ernie's fall down the ladder, and that's just weird....Nothing downloadable that we ourselves could play with...
Last edited:
A NEW DAY, a new module. Bright and early, Sam gathers our parts for the transporter plate assembly.

Conrad had quite a challenge tracking down the original 1701 parts! Enterprise's bridge transporter was only in service from 2272 to 2278--all bridge transporters were gradually phased out in scheduled service upgrades. The module shells were easy enough to lay hands on, but the mechanics and buffers were lost--Conrad finally located them in two different fleet scrapyards. They could be restored, but the mounting frame was too damaged to salvage. Fortunately, Willie whipped us up a new frame using the original dimensional specs. Our miniplates themselves are unavailable, having been reassigned to engineering duty on the T/T U.S.S. Anaximander NCC-3804 in 2279, and they are still on her. (For those not in the know, the Anaximander has a long and storied history, and is almost as famous in trucking circles as the Enterprise was among the exploratory set.) Conrad found two new-old stock miniplate units in a warehouse 'way out in Tellarian space, which are the same model number and production run as the originals on 1701. Like I mentioned earlier, Conrad's OCD comes in useful sometimes. He's been like a bulldog making sure every possible scrap of materiel for this project is as authentic to as-flown as possible.

If you've never seen an NK TopSide shipping crate in action, it really is a marvellous thing. It is designed specifically for bulky items, or stacks of smaller items, that require manual offloading. It has a self-contained small hydraulic pump, lift, and batteries that enable its contents to lift straight up by degrees out of the crate; revealing them at shoulder-level for unpacking in an ergonomically-optimal manner. Here is Sam activating the crate, (about 50% raised now,) giving us our first peek at the contents snuggled inside. A very nice but unusual way to ship odd old parts like these instead of just strapping them down to a pallet. Conrad must have really talked up their importance to the scrapyard--this is the next best thing to having them delivered gift-wrapped!

When the team arrives, they waste no time on this new challenge. Tomas and Eddie are unloading the TopSide, Mike tackles the NOS miniplates, and Sam's cutting the tiedown straps on the new frame. It's not exactly a simple jigsaw puzzle--we're reassembling a collection of very old, dusty, disused, and obsolete parts that involve very high currents and radioactive components that rip apart atom-by-atom anything it touches. So, a typically fun morning for Starfleet engineers! What could possibly go wrong?

So far, so good. Using the old blueprints, we found all parts present and accounted for, and the serial numbers confirm the unit was used on Enterprise. Considering the state of the damaged frame, the components themselves were very straight, and we mounted them with hardly any correction needed. As far as possible so far, circuit continuity has checked out, so on we go! We install the inner and outer cove shells above the assembly in anticipation of installing the module shell around the frame.

Next, the miniplates bolt in. (As expected from NOS items, they fit perfectly and everything lines up.) More testing, double-checking, and finally hooking her up to a massive EPS lead and the little computer. As before, the computer will 'fool' the transporter into initiating a cycle, as well as running continuing diagnostics. The computer will instantly cut power at the first sign of an internal error. Malfunctioning transporters are never a good thing. People think of transporters as safe and foolproof--but that's only because the systems are thoroughly engineered with multiple redundancies and fail-safes built-in to prevent alignment errors, buffer errors, sync errors, Heisenberg errors, stream errors, and so on. Nevertheless, firing one up for the first time is always a trepidacious experience even for the most hardened engineer. So we do what any good engineers would do...we break for lunch first!

After lunch, and here we see two electrical engineers doing what they do best. After sequentially and systematically going through a gradual power ramp-up, Tomas monitors the plasma stream as Sam slowly brings up the energizer. I'm amazed at how much power transporters draw: even initating an empty stream dims the lights in the entire building. This won't be an issue when we parallel it into the bridge batt/gen unit, but we may have to re-think our plan to have the energizer running continually on display. Maybe we'll have it cycle every ten minutes or so...we'll have to run the numbers and see.
At this point, it may be useful to talk about why bridge transporters were so briefly used on Starships, and why they haven't been used since.
The "Phase II" development plans had included accommodation for a single "mini-plate" on-bridge transporter, and from eight to sixteen similar transporters at strategic locations onboard ship, which would allow rapid delivery of parts, samples, equipment, etc. among labs, maintenance, engineering, stores, and so on. By the time of "Refit" development, the bridge module had been expanded, featuring two independent plates and pattern buffers, with capability for site-to-site, vector, and stock retrieval modes on either plate.
Mini-transporters were an experiment in miniaturization. Transporters until that time took an entire room's worth of associated machinery. Sizing it down to fit on a bridge (or in a cabinet) involved not just reducing the size of the plates, but reducing the plate resolution as well.
This meant that only inert, non-organic items with a relatively uniform molecular structure could be beamed. (Metallurgists discovered that the technique, as Low-Resolution Reconstruction, actually was a tremendous benefit in tightly bonding certain alloys, and LRR is used in large-scale metallurgy to this day.)
Although miniplates were designed for easy transference of small items throughout a Starship, they proved troublesome to maintain, and tests demonstrated that repeated low-res beaming of the same item could result in molecular drifting, (like making a copy of a copy of a copy.)
Bridge transporters were rarely used in the field. Their small size was found to be inconvenient, for larger items could be vector-beamed directly to the bridge, and small items were usually accompanied by a technician when needed. In practice, actually, the primary use for the bridge transporter was discovered to be stock retrieval of foodstuffs during night watch shifts--a practice Starfleet Command deemed to be unacceptably wasteful of ship resources.
Alternative modules, including status boards, and gravity, cargo, or tractor beam control were designed to retrofit the existing module shells for certain Starship classes upon filing a request with Starfleet Operations. Enterprise's bridge transporter was replaced with status control boards in 2278.
Minitransporter technology along with LRR has developed over the years. The ability to use LRR with stored datafiles led to the development of the modern replicator, and rapid mat/demat of LRR shells was used in early Holodeck development.

With the mech in place and tested, the module shells can be fitted. Top tip from Mike: put the inner shell on first, in case you have to tweak the frame slightly so that the plates fit flush to the shroud without unsightly gaps. Clamp the frame to the deck, then put on the outer shell.
With that, we'll call it a day. There's still some afternoon left, but we were here early, worked hard, and it's been a stresser. Tomorrow will be easier--viewscreens don't explode if you make a mistake. Ha!
Conrad had quite a challenge tracking down the original 1701 parts! Enterprise's bridge transporter was only in service from 2272 to 2278--all bridge transporters were gradually phased out in scheduled service upgrades. The module shells were easy enough to lay hands on, but the mechanics and buffers were lost--Conrad finally located them in two different fleet scrapyards. They could be restored, but the mounting frame was too damaged to salvage. Fortunately, Willie whipped us up a new frame using the original dimensional specs. Our miniplates themselves are unavailable, having been reassigned to engineering duty on the T/T U.S.S. Anaximander NCC-3804 in 2279, and they are still on her. (For those not in the know, the Anaximander has a long and storied history, and is almost as famous in trucking circles as the Enterprise was among the exploratory set.) Conrad found two new-old stock miniplate units in a warehouse 'way out in Tellarian space, which are the same model number and production run as the originals on 1701. Like I mentioned earlier, Conrad's OCD comes in useful sometimes. He's been like a bulldog making sure every possible scrap of materiel for this project is as authentic to as-flown as possible.
If you've never seen an NK TopSide shipping crate in action, it really is a marvellous thing. It is designed specifically for bulky items, or stacks of smaller items, that require manual offloading. It has a self-contained small hydraulic pump, lift, and batteries that enable its contents to lift straight up by degrees out of the crate; revealing them at shoulder-level for unpacking in an ergonomically-optimal manner. Here is Sam activating the crate, (about 50% raised now,) giving us our first peek at the contents snuggled inside. A very nice but unusual way to ship odd old parts like these instead of just strapping them down to a pallet. Conrad must have really talked up their importance to the scrapyard--this is the next best thing to having them delivered gift-wrapped!
When the team arrives, they waste no time on this new challenge. Tomas and Eddie are unloading the TopSide, Mike tackles the NOS miniplates, and Sam's cutting the tiedown straps on the new frame. It's not exactly a simple jigsaw puzzle--we're reassembling a collection of very old, dusty, disused, and obsolete parts that involve very high currents and radioactive components that rip apart atom-by-atom anything it touches. So, a typically fun morning for Starfleet engineers! What could possibly go wrong?
So far, so good. Using the old blueprints, we found all parts present and accounted for, and the serial numbers confirm the unit was used on Enterprise. Considering the state of the damaged frame, the components themselves were very straight, and we mounted them with hardly any correction needed. As far as possible so far, circuit continuity has checked out, so on we go! We install the inner and outer cove shells above the assembly in anticipation of installing the module shell around the frame.
Next, the miniplates bolt in. (As expected from NOS items, they fit perfectly and everything lines up.) More testing, double-checking, and finally hooking her up to a massive EPS lead and the little computer. As before, the computer will 'fool' the transporter into initiating a cycle, as well as running continuing diagnostics. The computer will instantly cut power at the first sign of an internal error. Malfunctioning transporters are never a good thing. People think of transporters as safe and foolproof--but that's only because the systems are thoroughly engineered with multiple redundancies and fail-safes built-in to prevent alignment errors, buffer errors, sync errors, Heisenberg errors, stream errors, and so on. Nevertheless, firing one up for the first time is always a trepidacious experience even for the most hardened engineer. So we do what any good engineers would do...we break for lunch first!
After lunch, and here we see two electrical engineers doing what they do best. After sequentially and systematically going through a gradual power ramp-up, Tomas monitors the plasma stream as Sam slowly brings up the energizer. I'm amazed at how much power transporters draw: even initating an empty stream dims the lights in the entire building. This won't be an issue when we parallel it into the bridge batt/gen unit, but we may have to re-think our plan to have the energizer running continually on display. Maybe we'll have it cycle every ten minutes or so...we'll have to run the numbers and see.
At this point, it may be useful to talk about why bridge transporters were so briefly used on Starships, and why they haven't been used since.
The "Phase II" development plans had included accommodation for a single "mini-plate" on-bridge transporter, and from eight to sixteen similar transporters at strategic locations onboard ship, which would allow rapid delivery of parts, samples, equipment, etc. among labs, maintenance, engineering, stores, and so on. By the time of "Refit" development, the bridge module had been expanded, featuring two independent plates and pattern buffers, with capability for site-to-site, vector, and stock retrieval modes on either plate.
Mini-transporters were an experiment in miniaturization. Transporters until that time took an entire room's worth of associated machinery. Sizing it down to fit on a bridge (or in a cabinet) involved not just reducing the size of the plates, but reducing the plate resolution as well.
This meant that only inert, non-organic items with a relatively uniform molecular structure could be beamed. (Metallurgists discovered that the technique, as Low-Resolution Reconstruction, actually was a tremendous benefit in tightly bonding certain alloys, and LRR is used in large-scale metallurgy to this day.)
Although miniplates were designed for easy transference of small items throughout a Starship, they proved troublesome to maintain, and tests demonstrated that repeated low-res beaming of the same item could result in molecular drifting, (like making a copy of a copy of a copy.)
Bridge transporters were rarely used in the field. Their small size was found to be inconvenient, for larger items could be vector-beamed directly to the bridge, and small items were usually accompanied by a technician when needed. In practice, actually, the primary use for the bridge transporter was discovered to be stock retrieval of foodstuffs during night watch shifts--a practice Starfleet Command deemed to be unacceptably wasteful of ship resources.
Alternative modules, including status boards, and gravity, cargo, or tractor beam control were designed to retrofit the existing module shells for certain Starship classes upon filing a request with Starfleet Operations. Enterprise's bridge transporter was replaced with status control boards in 2278.
Minitransporter technology along with LRR has developed over the years. The ability to use LRR with stored datafiles led to the development of the modern replicator, and rapid mat/demat of LRR shells was used in early Holodeck development.
With the mech in place and tested, the module shells can be fitted. Top tip from Mike: put the inner shell on first, in case you have to tweak the frame slightly so that the plates fit flush to the shroud without unsightly gaps. Clamp the frame to the deck, then put on the outer shell.
With that, we'll call it a day. There's still some afternoon left, but we were here early, worked hard, and it's been a stresser. Tomorrow will be easier--viewscreens don't explode if you make a mistake. Ha!
Last edited:
Is it wrong that I 'hear' the narrator speaking with a John Ratzenberger/'Noo Yawk' Working Joe voice? 
This thread is so much fun... I can't wait to see your team complete their work!
A suggestion once this is done. Do the Interior of the Drax space station from Moonraker, but tweak it a bit for trek--that way--we might see a bit of what Ken Adams Planet of the Titans interior might have been.
Heck--the Moonraker set looks more like how I envisioned Regula One's interior. The telescope Drax stands under might be like one on one of Regula's "arms"
Heck--the Moonraker set looks more like how I envisioned Regula One's interior. The telescope Drax stands under might be like one on one of Regula's "arms"
'Done'? You're assuming an end-point that may never arrive! 
Seriously, though, that's a very cool idea.
Seriously, though, that's a very cool idea.
THE VIEWSCREEN MODULE ASSEMBLES much the same as you've seen before, with the additional step that the edges now attach to the modules on either side. This provides overall rigidity to the shell, but it is also a unique requirement for the screen module, as it is unable to support itself independently.

This module needs to be built from the outside-in. The outer shell goes in first, locking all three modules together. Eddie's up on the ladder attaching the outer cove now. As you can see, there's no inner shell per se, as the viewscreen extends beyond the full width of the module. The inner shell consists of a lower section that supports the screen, and a narrow trim piece that attaches to the upper cove and holds the screen from the top.

With the upper and lower trim pieces in place, the screen assembly can be slotted in as Bob and Mike are doing here. It's a heavy assembly, and getting it in place is a little fiddly. Ernie is behind the module looking through the access holes and checking the alignment. The screen has to be centered properly for the end trim pieces to fit in and lock the entire screen in place.
The bridge viewscreen is unique in that it is a pseudoholographic display. All the other bridge displays are true holoscreens or 2D monitors (and one holographic recorder/projector--more on that later.) The viewscreen is a flat display that uses differential-parallax filters to give depth of field to the image. The illusion is limited, but effective when displaying exterior views and tactical displays, when infinite-scale layering is not an issue. Because of the DPF filters, the effect is most accurately reproduced within a narrow field of view. The lower bridge and library computer stations have the least-distorted view; the communications and engineering stations just start to see the DoF distortion around the edges of the screen. (Since the weapons station is out of the viewscreen's optimal FoV, it has its own dedicated screen and high-resolution targeting holoscreen.)

Since the viewscreen cuts into the transporter modules, the vertical screen trim pieces have to be slotted in separately, as Ernie is doing here. The top edge fits first, then the bottom end swings in and tabs hold it tight with a downward push, locking the viewscreen firmly in place from all sides.
Phase II Design stipulated that all bridge modules were to be independent and interchangeable. The first design revision certainly reflected that, to the extent that the selection of the modules on the bridge, and even the physical arrangement of those modules, would be mission-specific. To that end, the modules were built to suit three different bridge radii. (The "Old Three"--the cruisers, destroyer/scouts, and transport/tugs--are all Bridge Radius B, if you're interested.) So the design trials of '68 all had viewscreens self-contained in one module. In practice, though, the screen was just too small for A and B bridges. The parallax angle was too tight, for one thing; and the screen was too far away to see comfortably without eyestrain.
For C bridges this isn't a factor, and they still use the original design. For the big bridges, though, it necessitated widening the screen by 30% for the Refit design of '72. Unfortunately, this meant killing our modular design theory: three modules now had to be used together. You want your viewscreen flanked by your environmental and communication stations? Tough--you're stuck with transporters, bub. The unpopularity and subsequent phase-out of bridge minitransporters by '78 compounded the issue enormously.

Viewscreen now in place, Conrad connects the EPS and data lines. We fire up the computer, send a signal to the screen, and...
...nothing.
The crew then heard a string of colorful invectives coming from behind the module. Is it data or power? are you getting a signal? and (most importantly) whose job was it to check this thing before we got it installed? Not mine, thank goodness (and also thankfully not Ernie's, who had gone a peculiar shade of white.) Conrad suggested Sam as EE was at fault. Sam suggested back that Conrad is, after all, the visual interface specialist. Mike said he thought it was Tomas' job as data tech, because 'back in the day.' I'm protracting the conversation somewhat, and cleaning it up a great deal: but in the end it was decided that it was all a dog's breakfast because too many people were assuming, and there was nothing for it but to take the thing out again and troubleshoot it properly.

While the tech team play with plasma, electrons, and hexadecimal whatnots, Eddie and Mike decide the best method of staying out of the way is to install the gangway ladder that shares the transporter module. Here Eddie is setting in the interior tube wall and handholds.
The old Connie always had a gangway but it was rarely used other than for routine maintenance behind the bridge sections--safety regs stipulate that all parts of the ship must be manually accessible without turbolifts. Phase II planned for a separate gangway module that opened right onto the bridge: a sister to the lift modules that had a lovely, spacious curving stair down to the lounges via the access corridor. That module, too, was sacrificed for the sake of the viewscreen. The Phase II single-plate minitransporter was complete on one module, the viewscreen on another module, and the gangway on a separate module. Thus, the only three 'immovable' modules on the bridge were the lifts and gangway. Enlarging the viewscreen into the adjacent modules left no room for the transporter on a single module, so when it was split into two sections either side of the screen, the formerly-elegant stair became a gangway tube shoehorned in between the transporter and weapons modules. If you ever get a chance to be on a ship with an old 'C' type Phase II bridge, you just have to get a look at its stairs.

This is not to say that the Refit gangway is in any way a poor design! It is very well thought out and engineered to make the most use of the space available. Here is a very wide-angle shot of Mike setting the tube in place. The gangway is shut off from the bridge by an automatic door. As you come up from Deck 2, just to the left there is a red switch that activates the door. The accessway is sealed with a manually-locked door sized panel, just like the other access panels. I'm going to hand the camera up to Mike, so he can take a shot straight down the tube.

As you can see, the gangway is tight but well laid-out. It provides a direct path between the bridge, the access corridor, and the computer core--very handy in a case of maintenance and repair work, and actually superior to the Phase II staircase in that regard. The miniplate units can be accessed from the gangway tube as well.

The electrical wizards have done their work! The screen is back up, in place, and looks good. (Apparently the problem was a bad filter or something--screens aren't my speciality.) Although it looks fine to me, ol' OCD Conrad is in his element. He's checking and adjusting the pseudoparallax angle from every point in the room. Apparently, so Mike tells me, the old '60s UFP logo works just as well as a holographic test pattern: it is subtly 3D, and the stars behind the map crosshairs are good hardpoint parallax targets. Who knew?
We're all leaving Conrad to tweak his display to death while we go eat dinner. Mike says the weapons control module is the next to go in. 'It's a lot of fun to build,' he says. I'm not sure what to make of that. It certainly looks like it's gonna be complicated, and Mike will tell a lot of tales of its design evolution over dinner, I'm sure.
See you back in the warehouse, bright and early tomorrow.
This module needs to be built from the outside-in. The outer shell goes in first, locking all three modules together. Eddie's up on the ladder attaching the outer cove now. As you can see, there's no inner shell per se, as the viewscreen extends beyond the full width of the module. The inner shell consists of a lower section that supports the screen, and a narrow trim piece that attaches to the upper cove and holds the screen from the top.
With the upper and lower trim pieces in place, the screen assembly can be slotted in as Bob and Mike are doing here. It's a heavy assembly, and getting it in place is a little fiddly. Ernie is behind the module looking through the access holes and checking the alignment. The screen has to be centered properly for the end trim pieces to fit in and lock the entire screen in place.
The bridge viewscreen is unique in that it is a pseudoholographic display. All the other bridge displays are true holoscreens or 2D monitors (and one holographic recorder/projector--more on that later.) The viewscreen is a flat display that uses differential-parallax filters to give depth of field to the image. The illusion is limited, but effective when displaying exterior views and tactical displays, when infinite-scale layering is not an issue. Because of the DPF filters, the effect is most accurately reproduced within a narrow field of view. The lower bridge and library computer stations have the least-distorted view; the communications and engineering stations just start to see the DoF distortion around the edges of the screen. (Since the weapons station is out of the viewscreen's optimal FoV, it has its own dedicated screen and high-resolution targeting holoscreen.)
Since the viewscreen cuts into the transporter modules, the vertical screen trim pieces have to be slotted in separately, as Ernie is doing here. The top edge fits first, then the bottom end swings in and tabs hold it tight with a downward push, locking the viewscreen firmly in place from all sides.
Phase II Design stipulated that all bridge modules were to be independent and interchangeable. The first design revision certainly reflected that, to the extent that the selection of the modules on the bridge, and even the physical arrangement of those modules, would be mission-specific. To that end, the modules were built to suit three different bridge radii. (The "Old Three"--the cruisers, destroyer/scouts, and transport/tugs--are all Bridge Radius B, if you're interested.) So the design trials of '68 all had viewscreens self-contained in one module. In practice, though, the screen was just too small for A and B bridges. The parallax angle was too tight, for one thing; and the screen was too far away to see comfortably without eyestrain.
For C bridges this isn't a factor, and they still use the original design. For the big bridges, though, it necessitated widening the screen by 30% for the Refit design of '72. Unfortunately, this meant killing our modular design theory: three modules now had to be used together. You want your viewscreen flanked by your environmental and communication stations? Tough--you're stuck with transporters, bub. The unpopularity and subsequent phase-out of bridge minitransporters by '78 compounded the issue enormously.
Viewscreen now in place, Conrad connects the EPS and data lines. We fire up the computer, send a signal to the screen, and...
...nothing.
The crew then heard a string of colorful invectives coming from behind the module. Is it data or power? are you getting a signal? and (most importantly) whose job was it to check this thing before we got it installed? Not mine, thank goodness (and also thankfully not Ernie's, who had gone a peculiar shade of white.) Conrad suggested Sam as EE was at fault. Sam suggested back that Conrad is, after all, the visual interface specialist. Mike said he thought it was Tomas' job as data tech, because 'back in the day.' I'm protracting the conversation somewhat, and cleaning it up a great deal: but in the end it was decided that it was all a dog's breakfast because too many people were assuming, and there was nothing for it but to take the thing out again and troubleshoot it properly.
While the tech team play with plasma, electrons, and hexadecimal whatnots, Eddie and Mike decide the best method of staying out of the way is to install the gangway ladder that shares the transporter module. Here Eddie is setting in the interior tube wall and handholds.
The old Connie always had a gangway but it was rarely used other than for routine maintenance behind the bridge sections--safety regs stipulate that all parts of the ship must be manually accessible without turbolifts. Phase II planned for a separate gangway module that opened right onto the bridge: a sister to the lift modules that had a lovely, spacious curving stair down to the lounges via the access corridor. That module, too, was sacrificed for the sake of the viewscreen. The Phase II single-plate minitransporter was complete on one module, the viewscreen on another module, and the gangway on a separate module. Thus, the only three 'immovable' modules on the bridge were the lifts and gangway. Enlarging the viewscreen into the adjacent modules left no room for the transporter on a single module, so when it was split into two sections either side of the screen, the formerly-elegant stair became a gangway tube shoehorned in between the transporter and weapons modules. If you ever get a chance to be on a ship with an old 'C' type Phase II bridge, you just have to get a look at its stairs.
This is not to say that the Refit gangway is in any way a poor design! It is very well thought out and engineered to make the most use of the space available. Here is a very wide-angle shot of Mike setting the tube in place. The gangway is shut off from the bridge by an automatic door. As you come up from Deck 2, just to the left there is a red switch that activates the door. The accessway is sealed with a manually-locked door sized panel, just like the other access panels. I'm going to hand the camera up to Mike, so he can take a shot straight down the tube.
As you can see, the gangway is tight but well laid-out. It provides a direct path between the bridge, the access corridor, and the computer core--very handy in a case of maintenance and repair work, and actually superior to the Phase II staircase in that regard. The miniplate units can be accessed from the gangway tube as well.
The electrical wizards have done their work! The screen is back up, in place, and looks good. (Apparently the problem was a bad filter or something--screens aren't my speciality.) Although it looks fine to me, ol' OCD Conrad is in his element. He's checking and adjusting the pseudoparallax angle from every point in the room. Apparently, so Mike tells me, the old '60s UFP logo works just as well as a holographic test pattern: it is subtly 3D, and the stars behind the map crosshairs are good hardpoint parallax targets. Who knew?
We're all leaving Conrad to tweak his display to death while we go eat dinner. Mike says the weapons control module is the next to go in. 'It's a lot of fun to build,' he says. I'm not sure what to make of that. It certainly looks like it's gonna be complicated, and Mike will tell a lot of tales of its design evolution over dinner, I'm sure.
See you back in the warehouse, bright and early tomorrow.
Last edited:
MIKE WASN'T JOKING, apparently. It's taken the better part of three-quarters of an hour this morning just to dig all the weapons-associated shell parts out of the shipping container. Why do people always tend to put the biggest, oddest-sized parts at the very back...?

In any case, after thorough cataloging, this pile o' stuff is (or hopefully will be eventually!) the weapons console. The cove shells are still recognizable as the standard module items, but the wall shells are broken up into an Erector-set of awkward looking bits. This console is wired a bit differently than the other bridge modules, so Mike suggested not putting the controls into the board until the shell was installed. Fine by me...it gives me a chance to see firsthand just how this iconic piece of Refit design goes together.

Fortunately, we have an old copy of the engineer's assembly datasheet to back up Mike's memory. He recalls there are many ways to build yourself into a corner here! Like the other modules, the cove shells go in first. Since there aren't any light pods in the cove, it doesn't require any hookups to the air handler above. Next to go in is a podium platform that bolts into the floor. The long, narrow piece of the inner shell fastens on next, as Ernie has just done here, and Bob is joining it onto a low trapezoidal panel that will support the inside edge of the control board.
You know, putting a dedicated weapons station on the bridge at all was a challenge for Starfleet. It was argued that weapons deployment as a function of the Helm was sufficient, and would continue to be. A weapons officer on the bridge would be seen as overly militaristic, they said, and not in keeping with our exploratory image.
The counterargument was that as the Federation expanded its reach ever farther into the galaxy, we would come up against ever-more species that would have a territorial claim on various sectors. Our existence to them as a powerful Federation may be seen as a threat to their security that they may act upon. In addition, the Organian treaty was beginning to break down, and the Klingon and Romulan Empires had begun again to press their influence against Federation border systems. Starships would be called upon to assist those systems, and a dedicated weapons officer would free the helm to focus on increased maneuverability and evasion tactics. In the end, the decision for some sort of weapons station on all Starships with armaments won out--but with the caveat it be referred to as a 'defense' station, 'defensive' officer, et cetera, to highlight the nonbelligerency of the Federation. An odd stipulation, but as we've discussed before, this was a very political time for Starfleet.

The next pieces form the back and return of the nook that the control board sits upon. Eddie is lending a hand from the front side while the boys are fastening the panels from behind.
Phase II design for the defense bridge modules was a self-contained unit very similar to the newly-designed standing stations, and like those was not intended to be continually manned. The officer sat in a little alcove facing the shell. A large holographic targeting sphere was at his left, the control board to the right. The design parameters were that the officer would have an intuitive interface with rapid targeting ability and direct access to firing controls; be in such a position that would maximize focus and attention while minimizing distraction; have direct lines of communication with phaser and torpedo rooms; and have secondary and tertiary emergency power backups. On paper, everything worked very well. In practice, it was a disaster.
Oh, now is one of those non-intuitive tricky parts: the upper half of the rear shell must now be fastened on.

As you can see from this shot in the accessway, the shell must be bolted on from the front side like Eddie is doing here, since the kick-out for the niche makes it impossible to reach the upper edge of the shell from behind. If any more of the inner panels were in place, the bolt holes would be blocked. Similarly, if the rear shell were built from the base up (like all the others are,) there would be no way to get to the rear of the targeting screens to install them!
If all of this is starting to sound suspiciously like some last-minute engineering workarounds, well then you'd be right. This Refit version of the weapons station (oops, sorry, defense station) is completely different from the Phase II design plans. And surprisingly, it doesn't have anything to do with the modularity of the stations this time, rather, it's based largely on human psychology. I'll explain more after I get around to the front; they're putting in the console now.

Here's the control console in place, which is a good time to tell a little of how the design got changed. Firstly, the controls were found to be insufficient. In the field, the most-heard feedback was that the defense officer needed direct access to shield control and power distribution. Separating shields from weapons caused a bottleneck in response time, so the new module enabled shield bias adjustment on the fly. The change from a single to dual-tube torpedo bay design necessitated a complete staging control setup, and the module was given assign panels to primary, secondary, tertiary, and backup power feeds. Naturally, this expanded the area needed for the control board, and several layouts were floated from '69 to '71.

Oh, while I've been talking Eddie's put the back wall up. You can see the cutout for the EPS battery backup right in the panel. Below that is where the circuit breakers are accessed, so the officer has literally fingertip access to everything.
Anyway, over the years the weak points of the various layouts were ironed out, and many of them had to do with human psychology. Facing away from the main screen and turning to the targeting sphere did isolate the operator from distraction, but the hardwired need to 'face who you're fighting' is strong: so strong that avoiding it was a distraction in itself. The console was thus turned ninety degrees to face the viewscreen, and it was discovered that on average operator distraction reduced by twenty percent, and stress by nearly fifteen.
Further studies suggested that the perceived physical vulnerability of the operator had a bearing on tactical decision making. That led to a drastic change in the shape of the alcove, and the addition of what we referred to as 'the cave,' which Mike and Bob are bringing in now.

The partially-enclosed alcove shape, along with a podium riser and canting the board slightly further into its corner, created the illusion of a space that is safe, sheltering, and protecting. Even with full knowledge that the cave's protection is illusory, operators in simulated battle conditions in the field showed a marked increased in decision-making speed, targeting accuracy, and tactical response times. The knowledge gained through these experimental trials has influenced weapons system control standards to this day.

It's been a long morning, and Tomas is just finishing buttoning up the alcove shell. (It helps that he's the smallest one among us, too; it's a tight fit reaching some of those camlocks.) We just have time for a late lunch, then I'll get stuck into that enticing orange trunk, run the wiring and show you how to install the components!
In any case, after thorough cataloging, this pile o' stuff is (or hopefully will be eventually!) the weapons console. The cove shells are still recognizable as the standard module items, but the wall shells are broken up into an Erector-set of awkward looking bits. This console is wired a bit differently than the other bridge modules, so Mike suggested not putting the controls into the board until the shell was installed. Fine by me...it gives me a chance to see firsthand just how this iconic piece of Refit design goes together.
Fortunately, we have an old copy of the engineer's assembly datasheet to back up Mike's memory. He recalls there are many ways to build yourself into a corner here! Like the other modules, the cove shells go in first. Since there aren't any light pods in the cove, it doesn't require any hookups to the air handler above. Next to go in is a podium platform that bolts into the floor. The long, narrow piece of the inner shell fastens on next, as Ernie has just done here, and Bob is joining it onto a low trapezoidal panel that will support the inside edge of the control board.
You know, putting a dedicated weapons station on the bridge at all was a challenge for Starfleet. It was argued that weapons deployment as a function of the Helm was sufficient, and would continue to be. A weapons officer on the bridge would be seen as overly militaristic, they said, and not in keeping with our exploratory image.
The counterargument was that as the Federation expanded its reach ever farther into the galaxy, we would come up against ever-more species that would have a territorial claim on various sectors. Our existence to them as a powerful Federation may be seen as a threat to their security that they may act upon. In addition, the Organian treaty was beginning to break down, and the Klingon and Romulan Empires had begun again to press their influence against Federation border systems. Starships would be called upon to assist those systems, and a dedicated weapons officer would free the helm to focus on increased maneuverability and evasion tactics. In the end, the decision for some sort of weapons station on all Starships with armaments won out--but with the caveat it be referred to as a 'defense' station, 'defensive' officer, et cetera, to highlight the nonbelligerency of the Federation. An odd stipulation, but as we've discussed before, this was a very political time for Starfleet.
The next pieces form the back and return of the nook that the control board sits upon. Eddie is lending a hand from the front side while the boys are fastening the panels from behind.
Phase II design for the defense bridge modules was a self-contained unit very similar to the newly-designed standing stations, and like those was not intended to be continually manned. The officer sat in a little alcove facing the shell. A large holographic targeting sphere was at his left, the control board to the right. The design parameters were that the officer would have an intuitive interface with rapid targeting ability and direct access to firing controls; be in such a position that would maximize focus and attention while minimizing distraction; have direct lines of communication with phaser and torpedo rooms; and have secondary and tertiary emergency power backups. On paper, everything worked very well. In practice, it was a disaster.
Oh, now is one of those non-intuitive tricky parts: the upper half of the rear shell must now be fastened on.
As you can see from this shot in the accessway, the shell must be bolted on from the front side like Eddie is doing here, since the kick-out for the niche makes it impossible to reach the upper edge of the shell from behind. If any more of the inner panels were in place, the bolt holes would be blocked. Similarly, if the rear shell were built from the base up (like all the others are,) there would be no way to get to the rear of the targeting screens to install them!
If all of this is starting to sound suspiciously like some last-minute engineering workarounds, well then you'd be right. This Refit version of the weapons station (oops, sorry, defense station) is completely different from the Phase II design plans. And surprisingly, it doesn't have anything to do with the modularity of the stations this time, rather, it's based largely on human psychology. I'll explain more after I get around to the front; they're putting in the console now.
Here's the control console in place, which is a good time to tell a little of how the design got changed. Firstly, the controls were found to be insufficient. In the field, the most-heard feedback was that the defense officer needed direct access to shield control and power distribution. Separating shields from weapons caused a bottleneck in response time, so the new module enabled shield bias adjustment on the fly. The change from a single to dual-tube torpedo bay design necessitated a complete staging control setup, and the module was given assign panels to primary, secondary, tertiary, and backup power feeds. Naturally, this expanded the area needed for the control board, and several layouts were floated from '69 to '71.
Oh, while I've been talking Eddie's put the back wall up. You can see the cutout for the EPS battery backup right in the panel. Below that is where the circuit breakers are accessed, so the officer has literally fingertip access to everything.
Anyway, over the years the weak points of the various layouts were ironed out, and many of them had to do with human psychology. Facing away from the main screen and turning to the targeting sphere did isolate the operator from distraction, but the hardwired need to 'face who you're fighting' is strong: so strong that avoiding it was a distraction in itself. The console was thus turned ninety degrees to face the viewscreen, and it was discovered that on average operator distraction reduced by twenty percent, and stress by nearly fifteen.
Further studies suggested that the perceived physical vulnerability of the operator had a bearing on tactical decision making. That led to a drastic change in the shape of the alcove, and the addition of what we referred to as 'the cave,' which Mike and Bob are bringing in now.
The partially-enclosed alcove shape, along with a podium riser and canting the board slightly further into its corner, created the illusion of a space that is safe, sheltering, and protecting. Even with full knowledge that the cave's protection is illusory, operators in simulated battle conditions in the field showed a marked increased in decision-making speed, targeting accuracy, and tactical response times. The knowledge gained through these experimental trials has influenced weapons system control standards to this day.
It's been a long morning, and Tomas is just finishing buttoning up the alcove shell. (It helps that he's the smallest one among us, too; it's a tight fit reaching some of those camlocks.) We just have time for a late lunch, then I'll get stuck into that enticing orange trunk, run the wiring and show you how to install the components!
Last edited:
FASTEST. LUNCH. EVER. The shell assembly has taken longer than we expected, and now we're running behind schedule. I waste no time sorting the weapons components out of their trunk and into an untidy heap on the deck.

The plan is for me to install the components with their wiring, and feed the lines through the shell to Sam, who will run the wiring as we go. Unlike the other bridge stations, the defense components aren't daisy-chained together. The EPS lines are individually routed to a distribution box behind the shell, and the ODN lines are individually run to a parallel processor in the computer core. In a worst-case scenario, the defensive systems are designed to be literally the last operating station on board.

Much of that multilayered redundancy comes from a dedicated battery backup system. There's Ernie bringing in the EPS battery unit now. It slots directly into the shell wall in series with the EPS lines, which not only keeps it in a state of charge, but acts as a plasma-surge filter between the primary, secondary, and tertiary bridge power systems. Unfortunately, it was bidirectional, blocking plasma dissipation in the event of an overcharge on the console side. Following the V'ger probe incident (cf. SD7411,) we quickly redesigned the battery to shunt plasma backwash directly back into the ship's power systems. Just goes to show you can't plan for every eventuality.

Sam's lending a hand on the backside of the shell to help guide the battery in position. Although it's designed to be replaced periodically, it's still a tight fit against the shell, and a rather awkward shape to contend with. There's a tool that removes the battery from the back of the panel...but we don't have one. Nothing that the heel of your hand and a rubber mallet can't accomplish just as well.
It's at this point that we hear various beeps and toots from outside the bridge. Fred sticks his head in to tell us that our box truck is here to take the crates back. Really? Today of all days, when we're already behind?

It's all hands on deck to clean out the warehouse--except for Sam, who is staying behind to run the cabling while the rest of us scramble. Not quite sure how he talked Fred into that. To be fair, the arrival of that truck is several days overdue. We've been working alongside an increasingly-large pile of pallets, crates, and oceans of cardboard that we've tossed to the side from all the bits that have arrived from the far reaches. The S&R department needs to return all the crates to the depot, and haul off the trash. Of course, our little museum project is not what you might call high on Starfleet's list of priorities right now, so we'll take what we can get.
Bob and Eddie lend a hand spotting and loading with Fred, and the rest of us take out our frustration by gleefully breaking down cardboard boxes.
<realworld> Trimble 3DWarehouse credits: Box truck by Jared W. </realworld>

The alley behind the warehouse is our loading dock. It's now just wide enough for a truck to fit: our old dusty warehouse predates the townhomes that have encroached upon it by several decades. Good thing Fred is a wizard at the forklift! He navigates those tight corners like he was born behind the stick. (He just laughs it off, of course. He's also a crack Workbee pilot.)

That's the first truck packed to the gills: four 'small' bottle-crates, pallets, and cardboard.
There's a flatbed right behind for the huge bottle-crates, and by the time he's gone, the box truck will be back for the TopSide, radiocrates, and one of the trunks. So that's the next few hours blown, and that'll be the day. So much for getting the components installed. Let's see how Sam is getting along with the wiring.

Wow, not bad! He's practically done already. Right now, he's running the EPS lines from the breaker box, and thrown the loose ends into the console for me to hook up. The ODN lines (those are the greenish ones) are ready to be hooked in as well.
Well, I'm off to finish the gruntwork; no need to take pictures of that! We'll be back tomorrow morning to finish the station off and light it up.
The plan is for me to install the components with their wiring, and feed the lines through the shell to Sam, who will run the wiring as we go. Unlike the other bridge stations, the defense components aren't daisy-chained together. The EPS lines are individually routed to a distribution box behind the shell, and the ODN lines are individually run to a parallel processor in the computer core. In a worst-case scenario, the defensive systems are designed to be literally the last operating station on board.
Much of that multilayered redundancy comes from a dedicated battery backup system. There's Ernie bringing in the EPS battery unit now. It slots directly into the shell wall in series with the EPS lines, which not only keeps it in a state of charge, but acts as a plasma-surge filter between the primary, secondary, and tertiary bridge power systems. Unfortunately, it was bidirectional, blocking plasma dissipation in the event of an overcharge on the console side. Following the V'ger probe incident (cf. SD7411,) we quickly redesigned the battery to shunt plasma backwash directly back into the ship's power systems. Just goes to show you can't plan for every eventuality.
Sam's lending a hand on the backside of the shell to help guide the battery in position. Although it's designed to be replaced periodically, it's still a tight fit against the shell, and a rather awkward shape to contend with. There's a tool that removes the battery from the back of the panel...but we don't have one. Nothing that the heel of your hand and a rubber mallet can't accomplish just as well.
It's at this point that we hear various beeps and toots from outside the bridge. Fred sticks his head in to tell us that our box truck is here to take the crates back. Really? Today of all days, when we're already behind?
It's all hands on deck to clean out the warehouse--except for Sam, who is staying behind to run the cabling while the rest of us scramble. Not quite sure how he talked Fred into that. To be fair, the arrival of that truck is several days overdue. We've been working alongside an increasingly-large pile of pallets, crates, and oceans of cardboard that we've tossed to the side from all the bits that have arrived from the far reaches. The S&R department needs to return all the crates to the depot, and haul off the trash. Of course, our little museum project is not what you might call high on Starfleet's list of priorities right now, so we'll take what we can get.
Bob and Eddie lend a hand spotting and loading with Fred, and the rest of us take out our frustration by gleefully breaking down cardboard boxes.
<realworld> Trimble 3DWarehouse credits: Box truck by Jared W. </realworld>
The alley behind the warehouse is our loading dock. It's now just wide enough for a truck to fit: our old dusty warehouse predates the townhomes that have encroached upon it by several decades. Good thing Fred is a wizard at the forklift! He navigates those tight corners like he was born behind the stick. (He just laughs it off, of course. He's also a crack Workbee pilot.)
That's the first truck packed to the gills: four 'small' bottle-crates, pallets, and cardboard.
There's a flatbed right behind for the huge bottle-crates, and by the time he's gone, the box truck will be back for the TopSide, radiocrates, and one of the trunks. So that's the next few hours blown, and that'll be the day. So much for getting the components installed. Let's see how Sam is getting along with the wiring.
Wow, not bad! He's practically done already. Right now, he's running the EPS lines from the breaker box, and thrown the loose ends into the console for me to hook up. The ODN lines (those are the greenish ones) are ready to be hooked in as well.
Well, I'm off to finish the gruntwork; no need to take pictures of that! We'll be back tomorrow morning to finish the station off and light it up.
Similar threads
- Replies
- 129
- Views
- 4K
- Replies
- 0
- Views
- 117
If you are not already a member then please register an account and join in the discussion!