-
Welcome! The TrekBBS is the number one place to chat about Star Trek with like-minded fans.
If you are not already a member then please register an account and join in the discussion!
You are using an out of date browser. It may not display this or other websites correctly.
You should upgrade or use an alternative browser.
You should upgrade or use an alternative browser.
Building the Eaglemoss Enterprise-D partwork
- Thread starter Leathco
- Start date
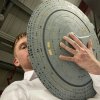
All lifeboats and windows are ‘painstakingly’ fitted individually. You can put the windows in to place (lights on or off) using any combination, but I have stuck with the recommended studio model layout. Here is a picture to show the scale of the saucer section a bit better.
View attachment 26586
Bloody hell that thing is huge.
Bloody hell that thing is huge.
Much bigger than I thought…
 Wow - positively massive - and that's just the saucer! You're probably going to need an industrial reinforced shelf just to display it.
Now THAT is a galaxy class sized saucer worthy of the name. Job well done and looking forward to seeing more of the construction as it unfolds. If any of you poor souls brave enough to build this beast ever worry about where to put this once finished, fear not! I have the solution for you! I am willing to trade you this authentic, vintage model of the Enterprise D from Generations!
No LEDs, but it does saucer separate, and look at that exquisite detail! The name and registry are pre-printed on this model as well!!!!

No LEDs, but it does saucer separate, and look at that exquisite detail! The name and registry are pre-printed on this model as well!!!!


Huh... So the nacelles have their own independent power source and no connecting wires? Interesting way to do it - I don't think I would have planned it that way myself, but looks like it works.
It's amazing! So they give you all the windows in both black and transparent? You could have them all dark, or all lit? Send your spare ones, then I'll at least have Enterprise windows in my collectionAll lifeboats and windows are ‘painstakingly’ fitted individually. You can put the windows in to place (lights on or off) using any combination, but I have stuck with the recommended studio model layout. Here is a picture to show the scale of the saucer section a bit better.
View attachment 26586

I had such fun smashing that thing into the grass in our backyard back thenNow THAT is a galaxy class sized saucer worthy of the name. Job well done and looking forward to seeing more of the construction as it unfolds. If any of you poor souls brave enough to build this beast ever worry about where to put this once finished, fear not! I have the solution for you! I am willing to trade you this authentic, vintage model of the Enterprise D from Generations!
No LEDs, but it does saucer separate, and look at that exquisite detail! The name and registry are pre-printed on this model as well!!!!


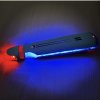
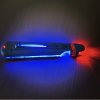
Can you get another one separately and make an AGT dreadnought? XDView attachment 26588 View attachment 26589 First warp nacelle is now complete….
The BTTF DeLorean had a whole bunch of extras with the subscription to be able to do all versions of the car from all three films. I wouldn't be at all surprised if they released an AGT expansion sub-series for this model.
Huh... So the nacelles have their own independent power source and no connecting wires? Interesting way to do it - I don't think I would have planned it that way myself, but looks like it works.
Yes, and they are also removable, with mechanisms which allow them to be easily taken off the support pylons rather than be fixed and screwed on. I have no idea if an ‘All Good Things’ Enterprise mod is in the works, but the fact that they can be removed so easily with a few clicks makes me think that this type of mod could easily be made by Eaglemoss or a third party developer as the nacelles are independent of the main power supply and transferable/hot swapable.
I have a bit of general advice to add to this message too. Sometimes if you over tighten a screw it can become ‘loose’ and not catch therefore not becoming tight and preventing a ‘satisfying tightness’ to that particular screws job. I hope that makes sense? If this ever happens, remove it, destroy the the defective screw in a vice in frustration and replace it with a spare FM screw. If you have a loose screw anywhere and start to panic about having ruined the thread and screw fit, just do this! Works every time! Especially with CP screws
I noticed that about the screws as well. A friend of mine whos an engineer by trade gave me a hint he said if you have to put in a few screws in a part put them in loosely at first then tighten them up afterward.
View attachment 26588 View attachment 26589 First warp nacelle is now complete….
Beauty overload!
Yes, and they are also removable, with mechanisms which allow them to be easily taken off the support pylons rather than be fixed and screwed on. I have no idea if an ‘All Good Things’ Enterprise mod is in the works, but the fact that they can be removed so easily with a few clicks makes me think that this type of mod could easily be made by Eaglemoss or a third party developer as the nacelles are independent of the main power supply and transferable/hot swapable.
I have a bit of general advice to add to this message too. Sometimes if you over tighten a screw it can become ‘loose’ and not catch therefore not becoming tight and preventing a ‘satisfying tightness’ to that particular screws job. I hope that makes sense? If this ever happens, remove it, destroy the the defective screw in a vice in frustration and replace it with a spare FM screw. If you have a loose screw anywhere and start to panic about having ruined the thread and screw fit, just do this! Works every time! Especially with CP screws
What stage are you at now? Issue 13 is on its way to me now and I'm excited to get the top of the saucer finished.
There was a massive delay from November until last week, but now things seem to be on track again and magazines 17 and 18 are being processed for dispatch now. I have finished up to magazine 16 which is section 66 I think? So over the half way mark now with the build!What stage are you at now? Issue 13 is on its way to me now and I'm excited to get the top of the saucer finished.
Back to the screw advice…. DEFINITELY put all the screws in loosely tightened before tightening completely. Also, always check for pinched wires….
There was a massive delay from November until last week, but now things seem to be on track again and magazines 17 and 18 are being processed for dispatch now. I have finished up to magazine 16 which is section 66 I think? So over the half way mark now with the build!
Back to the screw advice…. DEFINITELY put all the screws in loosely tightened before tightening completely. Also, always check for pinched wires….
Still a couple away from finishing the top of the saucer then. Having some trouble with the metal pieces not sitting flush with the rest of the sections, did attaching the bridge module fix that issue for you?
Still a couple away from finishing the top of the saucer then. Having some trouble with the metal pieces not sitting flush with the rest of the sections, did attaching the bridge module fix that issue for you?
I think that it is best to loosen panels next to the new panel that you are fitting if you are having trouble aligning it, but be careful about over tightening or damaging screw threads. Also check that no wires are trapped between the panel and frame. I would say that attaching the bridge definitely does tighten up the whole saucer section, this is also the case when you attach the skeletal frame to the bottom half of the saucer section, it screws in to the top skeletal frame and tightens it all a bit more stopping any creaking when the model is moved. I did put black insulation tape behind black windows though, and also around some of the panels joins underneath which stops the light bleed. Insulation tape is really thin so does not get in the way of how any panels fit. Just small slithers of insulation tape do the job.

Does anybody know if the front formation light on the saucer section is supposed to flash? The two rear lights either side of the impulse engines and the port/starboard lights do flash, but my front formation light is solid no matter which way I plug it in? Also got a tip about the front formation light later when I have finished it properly as you need to do a bit of tweaking to get it to fit correctly, I’ve just about managed it now but can’t continue to screw it in to place until Monday.
IIRC, the lights on the edge of the saucer were solid. I remember when I first saw it after seeing the E-refit's blinkies for years that it seemed a little odd. Might be worth a quick check on YouTube, though.
IIRC, the lights on the edge of the saucer were solid. I remember when I first saw it after seeing the E-refit's blinkies for years that it seemed a little odd. Might be worth a quick check on YouTube, though.
i think that they look great blinking, it just seems off that four on the sides blink and the one at the front center is solid. I’ll do some research on YouTube tonight when I get home! I can live with it not blinking it just seems odd. I would ask on Facebook in the build group but I’m not using Facebook at the moment.

Similar threads
- Replies
- 21
- Views
- 2K
- Replies
- 1
- Views
- 501
If you are not already a member then please register an account and join in the discussion!

 )
)

