• Welcome! The TrekBBS is the number one place to chat about Star Trek with like-minded fans.
    If you are not already a member then please register an account and join in the discussion!

Question about model kit priming and painting

SD70ACe

Lieutenant Commander
Red Shirt
As I lay out my plans for building model starships, I've got some quandaries that perhaps the experienced modelers here can weigh in on.

Two of the ships I'm building (the 1701 refit and the D) have hulls molded in the proper color, and another (the NX-01 refit) will require painting in order to match the resin pieces to the rest of the kit. I've been told that even for proper color molds, I should prime and paint them anyway.

So here's the rub: I do not own an airbrush, nor can I afford one. For primer, I know I could use a can of Krylon or something similar...but I also live in an apartment, and do not have a garage or other wide-open space in which to paint. I'm stuck with my kitchen table. How much space would I need in order to spray the models? (The ships are 1/1400 to 1/2500 scale, so they're not too big.) Also, should I prime the pieces while they're still on the sprues, or would touching up the connection points after removal from the sprues be too difficult to match?

Thanks in advance for any advice you can offer! :)
 
For primer, get a spray can of testors Primer Gray, or something similar, made specifically for plastic models (it works on resin too). For the resin, you have to wash the parts in dish detergent first, because they usually still have mold-release lubricant on them, and the paint won't stick.

Taking them off the sprue for priming is optional. You don't necessarily have to touch up the attachment points after removal, but you can if you're a completist ;). You souldn't have a problem finding a color to match, or at least come close. The largest parts, the hull, the saucer, the engines - sure, take them off the sprue.

Being in an apartment is indeed a problem for spraying. I haven't lived in one for 25 years, so I'm going to leave that advise to someone with more recent experience.

And yeah, even if the plastic is the right color, it's more, I dunno, "professional"? to prime and paint anyway. One can always tell bare plastic from paint, paint always looks better, and decals don't always stick very well to bare plastic. Plus, the ONLY way to make seams disappear is to sand them smooth (fill gaps with putty if needed), and paint over them.
 
Listen to Forbin. He is wise in the way of The Force .. er.... modeling... ;)

Q2
 
Cool, thanks. I always wash my kits before assembling them; I learned that lesson a long time ago. :D

Hopefully I can find some kind of spraying space solution. I know they make spray booths, but those are obscenely expensive.
 
In an apartment with no balcony? All I can suggest is to crank a window in a room. You can build a make shift fume hood if you're so inclined. Really, it's just a big card board box lined with aluminium foil, a hole on top with a decent fan, and an bendy extraction hose from a clothes drier (they're cheap at a hardware store). And point the hose out the window. They bigger the box, the less over spray getting back on the model. A strong fan helps as well. A clear plastic sheet on the front doesn't hurt, but isn't needed so much.
 
Nope, no balcony. :(

I've also got a BSG Cylon Basestar model to build, but that thing's pretty big. I'm going to try and borrow someone's garage when I spraypaint that one.
 
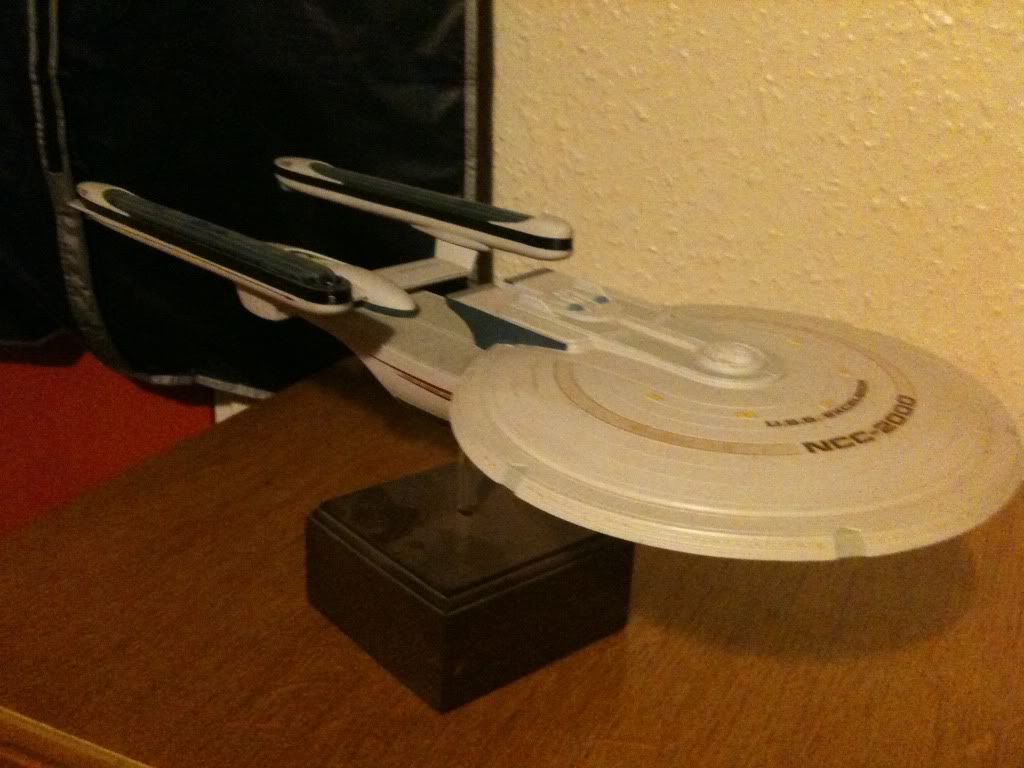
I normally prime my models with grey primer much better than white I always take the kits of the spurs better than touching up after. I normally spray my models never paint large areas just mask and spray here,s my example all sprayed only small amout of painting required.
bbd07676.jpg
 
In an apartment with no balcony? All I can suggest is to crank a window in a room. You can build a make shift fume hood if you're so inclined. Really, it's just a big card board box lined with aluminium foil, a hole on top with a decent fan, and an bendy extraction hose from a clothes drier (they're cheap at a hardware store). And point the hose out the window. They bigger the box, the less over spray getting back on the model. A strong fan helps as well. A clear plastic sheet on the front doesn't hurt, but isn't needed so much.

Great minds think alike. I whipped this up about 10 years ago. Still use it today, 4 apartments later.

http://www.zizolfo.com/family/john/models/spraybooth/booth.html
 
Hey, that's not a bad idea!

On a related note...how much space is needed for airbrushing or spraying? I usually do my model work at the kitchen table, but that's on the opposite site of the apartment from the windows. I've got a drafting table near the window that's currently covered with a WIP model railroad layout, but that's maybe half the size of the kitchen table. I don't want to get paint all over the place!
 
In an apartment with no balcony? All I can suggest is to crank a window in a room. You can build a make shift fume hood if you're so inclined. Really, it's just a big card board box lined with aluminium foil, a hole on top with a decent fan, and an bendy extraction hose from a clothes drier (they're cheap at a hardware store). And point the hose out the window. They bigger the box, the less over spray getting back on the model. A strong fan helps as well. A clear plastic sheet on the front doesn't hurt, but isn't needed so much.

Great minds think alike. I whipped this up about 10 years ago. Still use it today, 4 apartments later.

http://www.zizolfo.com/family/john/models/spraybooth/booth.html

That's too funny, dude... All modelers should have fume hoods.

Hey, that's not a bad idea!

On a related note...how much space is needed for airbrushing or spraying? I usually do my model work at the kitchen table, but that's on the opposite site of the apartment from the windows. I've got a drafting table near the window that's currently covered with a WIP model railroad layout, but that's maybe half the size of the kitchen table. I don't want to get paint all over the place!

Spraying can really be a pain in confined areas. The spray can litterally rain back down on the model creating a very fine mottled finish. Of course a super fine sanding can take care of that. The more space and ventilation, the better. It's hard to give an actual dimension. Just bigger is better.
 
Yeah. I usually just have a fan on, and spray lightly and carefully toward the floor. But once in a while I end up with a nice film of overspray on stuff. I usually toss the instruction sheet on top of any bits I don't want spray to land on.
 
How wide of an area do you use for your spraying, and how far away from the model should the nozzle be? Please forgive my constant questions; I'm a complete novice at this. :(
 
I always spray outside. Unless it's raining. Even then, I have covered areas I can stand in and still spray. I hold the can (or airbrush, but usually I prime with a can) about 8 to 10 inches away from the target and spray with smooth even passes. Start spraying well before the nozzle is pointed at the model and keep spraying until the spray is past the model. This is because many nozzles will collect paint and sputter it in big nasty drips as you press and release it. Avoid the problem by overspraying.

Another thing for me, I live in the Pacific Northwest where it is usually cold and wet all the time except Summer. If the weather isn't ideal for spraying outside, I have found that you can still get pretty consistently good results by running the can under warm (i.e. not quite hot) water from the tap. This warms the paint and lets everything flow more smoothly, giving you a smoother finish even it's technically too cold to be spraying.

Enjoy!

--Alex
 
Area size depends what you have available relative to how big the model is. As far as distance, 6"-12" is typical depending on how strong your can sprays. The trick to good spray painting is less about distance and more about how you handle the can.

Always start off your subject. You don't want to have the impact of a splash of paint on the surface by starting on the model.

Move continuously across the model and finish off the other end. Same logic as why not to start on the model.

Don't try to get perfect coverage in a single pass. Expect to go over it a couple of times. Wait anywhere from a few hours to the next day between coats depending how fast or slow your paint of choice dries. If you're using flat (non-gloss) paint, you can generally work faster, spraying two or three times in one day. If you're using gloss, best to let it sit overnight between coats.

If you're spraying indoors, try to find an area that's relatively dust free. If the area has a fan or some way of moving air, let it run for a little while before spraying to get rid of airborne particles. If you're spraying outside, wait for a day with very little wind, otherwise your paint will go everywhere except the model. If there is a slight breeze, wait for pauses or try to work with it, spraying in the same direction the wind is blowing.

Either way, indoor or out, you want the temperature to be in the 70 F range. Too cold and the paint will "freeze" on the way out, effectively becoming colored snow. Too hot and it will dry before it has a chance to settle on the surface and level itself out leaving you with a gritty surface that needs to be sanded down or even stripped before re-spraying.

If you've never spray painted before, pick up a few car or military kits at Big Lots or the Dollar Store to experiment on first. Don't worry about building them, just use the larger body parts as target practice.
 
Thanks for all of the advice, guys. I think I'm going to wait until the weather warms up in a few months, and just do my spraying in my folks' garage. :)
 
Got another question for you folks: how many coats of primer and paint? I was thinking one primer, two paint. I'll be using spray cans, not airbrushes. I'll try out Testors flat gray primer, and as for the main hull colors...well, I'm not so sure. Somehow, I have to find duck egg blue (1701-D) and pearlescent white (1701 refit), and I don't think Testors or Tamiya makes those in spray form. At least the NX-01 refit will be okay; I think I'll go with a titanium hull color for that one. Unless you guys have better suggestions, in which case I'm all ears! :D
 
I don't think more than one copat of primer is necessary, as long as it covers and you've gotten all the seams and flaws filled and sanded so they don't show after priming.

Main color coats? "until it looks good." Could be one, could be three. You don't want too many, of course - too thick will start to hide details.

And I'm pretty sure Tamiya makes a pearl white spray.
 
Hmm...so it's better to build the model first, then prime/paint? I was going to prime/paint on the sprues, and touch up later.
 
Depends. You're generally supposed to eliminate visible seams. This means you should assemble the major assemblies, then putty and sand the seams, THEN prime and paint. Small detail parts can be left on the sprue for painting.

For example, when I build an airplane model:

Paint all cockpit (and other interior) parts on the sprue. If there are some fiddly subassemblies, maybe I'll assemble them first and paint them off the sprue.

Assemble and install the cockpit (and any other internal parts).

Assemble the fuselage, unpainted. Putty and sand the seams.

Assemble the wings, unpainted. putty and sand.

Assemble wings and tail to fuselage. Do any puttying and sanding required at the joins.

Now I'm holding an assembled, unpainted airplane. NOW I prime (after masking the cockpit of course) on coat. Look it over for any places that need more filling and sanding. Do the filling and sanding. Prime one more coat to check.

NOW start painting the final color scheme.
 
Of course it's all relative. There are modelers who don't care about the seams. assembly is different for starships than airplanes.

You can build and paint the Enterprise in sections - saucer, hull, engines - all separate, then glue 'em together last.

There's really no "rule" so much as individual preference.
 
If you are not already a member then please register an account and join in the discussion!

Sign up / Register


Back
Top